
To crop a screenshot on a Mac, click the thumbnail that appears in the bottom-right corner right after you take it, and crop it there before it is saved. If the screenshot is already saved, open it in Preview, drag a rectangle selection over the part you want to keep and choose Tools > Crop (⌘K). In Sealpad you select the part with the Area tool and press ⌘K, and you can blur or copy part of the screenshot before you share it.
Take a screenshot on Mac
The shortcut you use decides how much cropping you need afterwards:
- ⇧⌘3 captures the whole screen.
- ⇧⌘4, then drag, captures only the area you drag over.
- ⇧⌘4, then Space, then click a window, captures that one window.
- ⇧⌘5 opens the screenshot toolbar, where you can choose where screenshots are saved, set a timer or start a screen recording.
Add Control (⌃) to ⇧⌘3 or ⇧⌘4 to copy the screenshot to the clipboard instead of saving a file. Otherwise screenshots are saved as PNG files on your Desktop.
If you know in advance which part you need, ⇧⌘4 and a drag is often all the cropping you will do.
Crop a screenshot from the thumbnail
Right after you take a screenshot, a thumbnail appears in the bottom-right corner of the screen for a few seconds. Click it to open the screenshot for markup, and crop it there before it is saved. It suits a one-off crop, because the file is saved already cropped.
If the thumbnail disappears before you click it, the screenshot has already been saved. Use Preview or Sealpad below.
Crop a screenshot in Preview
Preview comes with macOS and can crop any picture, including screenshots.
- Open the screenshot in Preview.
- Drag a rectangle selection over the part you want to keep.
- Choose Tools > Crop (⌘K).
Preview has no blur tool, so if the screenshot shows an address or a phone number you want to hide, use Sealpad.
Crop a screenshot in Sealpad
Sealpad is a free Mac app for PDFs and pictures. Use it when you also want to hide part of the screenshot, or copy just one part of it.
- Download Sealpad from the download page. It needs macOS 15 Sequoia or later.
- Open the screenshot with File > Open (⌘O), or drag it onto the Sealpad icon in the Dock. It opens as a copy.
- Show the markup tools with the Markup button in the toolbar, or View > Markup Tools (⇧⌘A).
- Choose Area and drag over the part you want to keep. A dashed outline shows the selection.
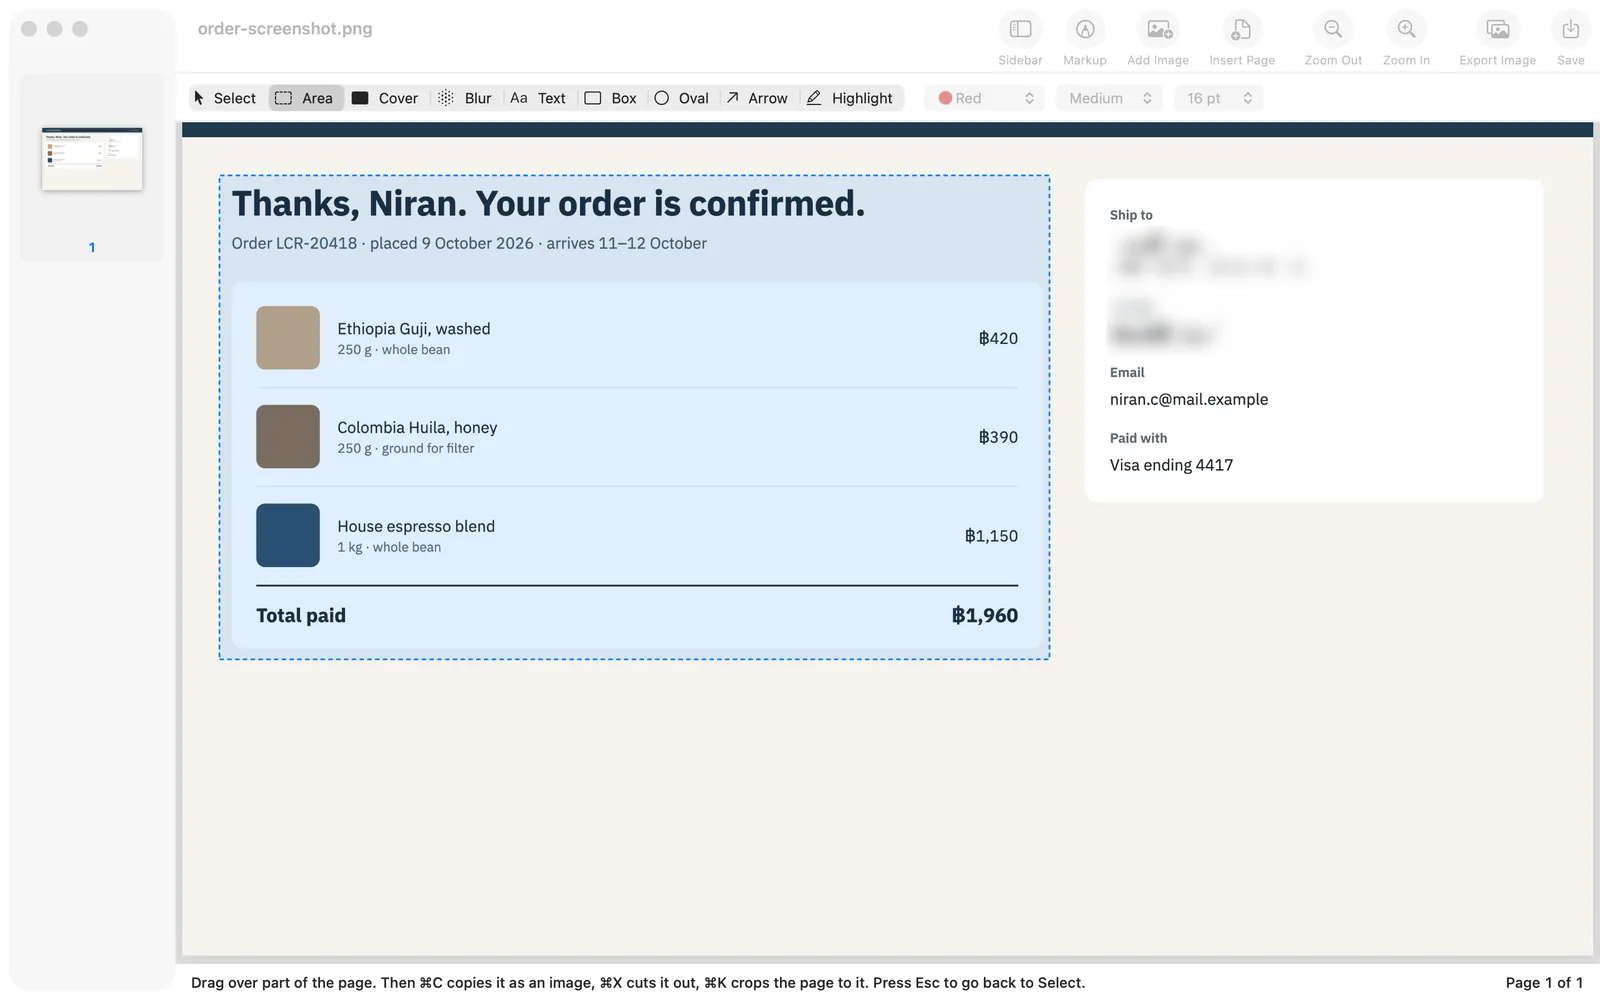
- Press ⌘K to crop the screenshot to that area.
- Press ⌘S and choose where to save. Sealpad saves it back as a picture at its original resolution, with a name that starts with the date, such as
2026-10-16_order.png.
The screenshot on your Desktop is never overwritten. If the crop is wrong, press ⌘Z to undo it before you save.
Blur or copy part of a screenshot before sharing
Screenshots of orders, bank apps and chats tend to include more than you meant to share. In Sealpad, with the markup tools showing:
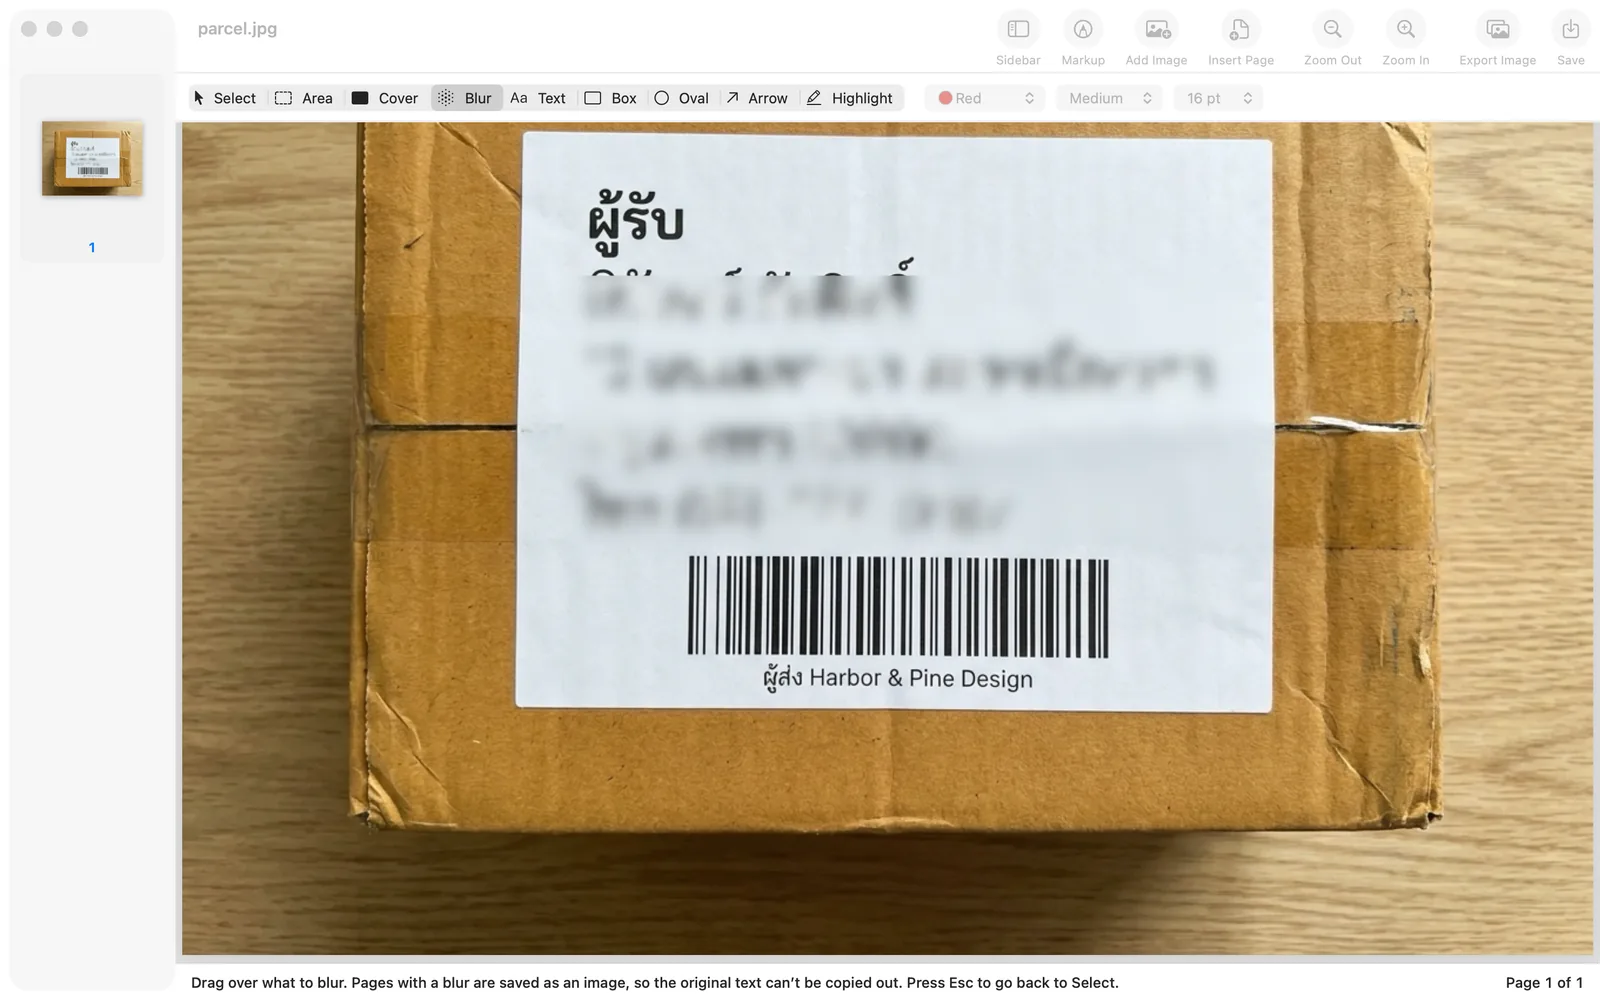
- Blur: choose Blur and drag a box over a name, address or phone number. Whatever is under the box is blurred.
- Cover: choose Cover and drag a box to hide something completely. It is white by default; pick black from the color pop-up menu.
- Copy part: choose Area, drag over a part and press ⌘C. Sealpad copies just that part as an image at the screenshot’s original resolution, so you can paste it into a message with ⌘V without saving a file.
- Cut part: ⌘X with an Area selection copies that part and leaves a white cover where it was.
The same tools work on photos. A picture of a parcel with the shipping label blurred:
The guide on blurring an image on Mac goes into choosing between Blur and Cover.
Crop an image on Mac
Everything above works for any picture, not only screenshots. Preview crops a picture with a rectangle selection and Tools > Crop (⌘K). Sealpad opens JPG, PNG, HEIC/HEIF, TIFF, GIF, WebP and BMP, so photos from an iPhone work as well, and Area followed by ⌘K crops them.
When Sealpad saves a picture, it keeps it as a picture at its original resolution: a JPG for photos, a PNG when the picture has transparency. You can also save it as a PDF.
If the picture you want to crop is already placed on a PDF page, double-click it in Sealpad to crop it in place. See how to add an image to a PDF on Mac.