To censor an image on a Mac, open it in Sealpad, choose the Blur tool and drag a box over the face, name or phone number you want to hide, then press ⌘S. The picture is saved back at its original pixel size with the blur as part of the image. If you want a solid block instead of a blur, use the Cover tool.
When to censor an image before sharing
Most pictures people share carry more than they mean to show. A few that come up again and again:
- A photo of a parcel, where the shipping label shows the recipient’s name, address and phone number.
- A screenshot of an order confirmation or a bank app, with an address, card digits or an account number.
- A chat screenshot that shows other people’s names and numbers.
- A photo with faces of people who did not ask to be posted.
Preview, the image viewer that comes with macOS, has no blur tool. Sealpad is a free Mac app that opens your pictures, lets you blur or cover any part of them and saves them back as pictures.
How to blur an image on Mac
- Download Sealpad from the download page. It needs macOS 15 Sequoia or later and runs on Apple silicon and Intel Macs.
- Open the picture with File > Open (⌘O), or drag it onto the Sealpad icon in the Dock. JPG, PNG, HEIC/HEIF, TIFF, GIF, WebP and BMP all open, so iPhone photos and Mac screenshots both work. The picture opens as a copy.
- Show the markup tools with the Markup button in the toolbar, or View > Markup Tools (⇧⌘A).
- Choose Blur.
- Drag a box over the part you want to hide. Whatever is under the box is blurred.
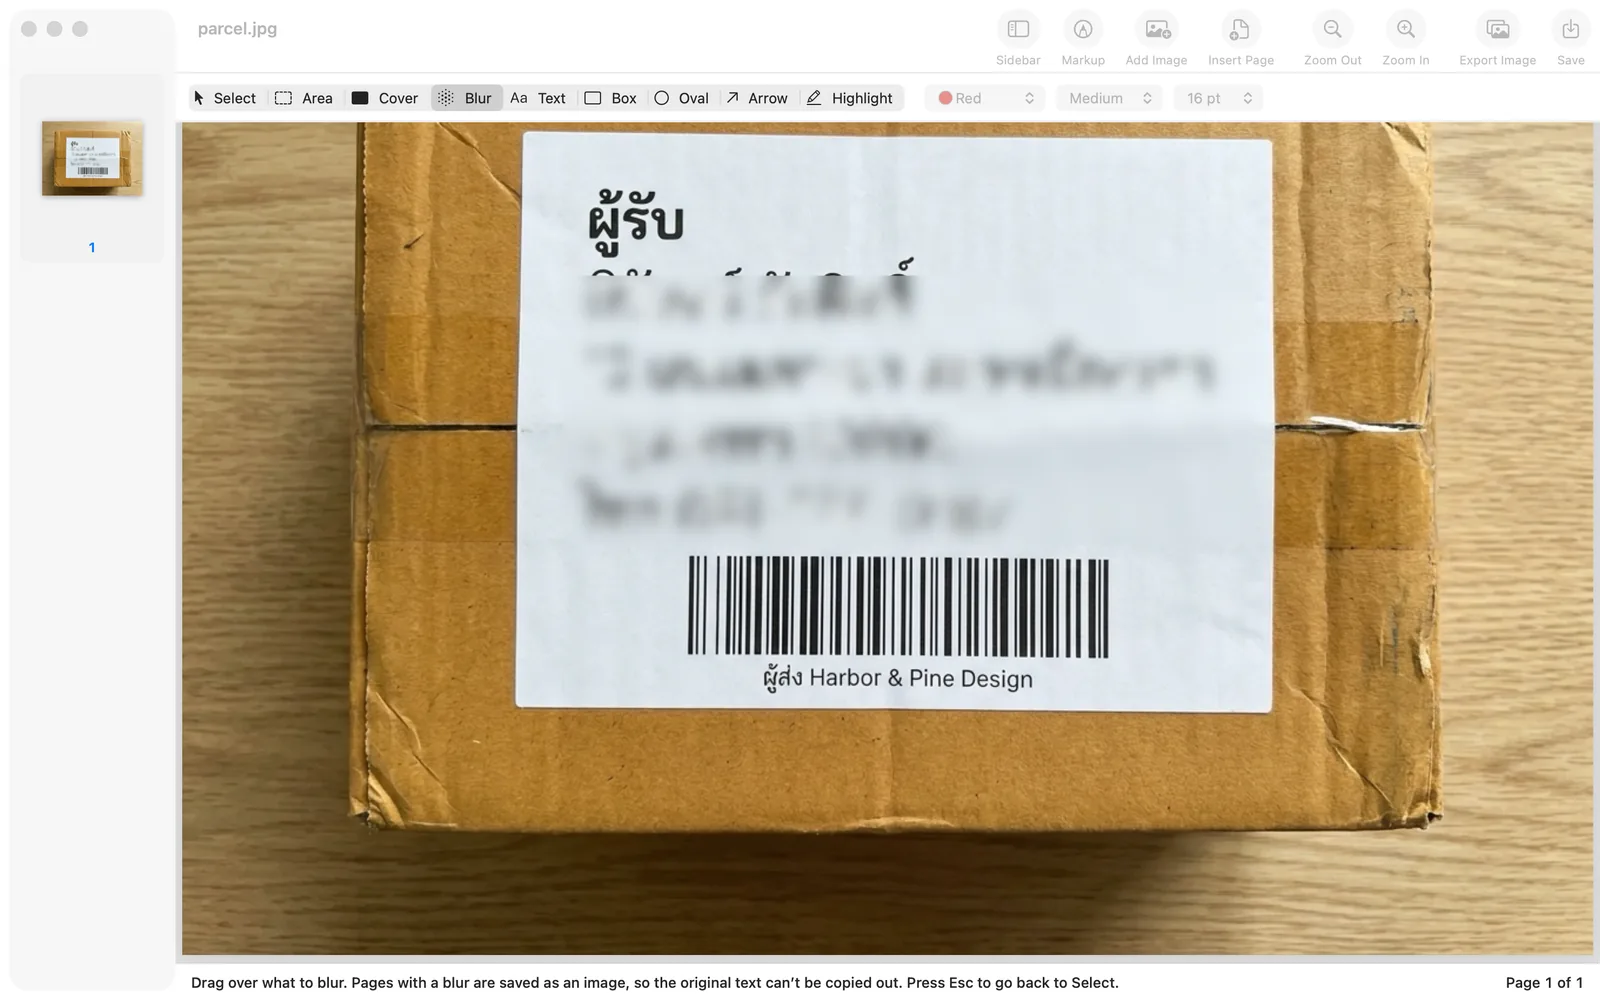
- Drag another box for each face, name or number you want to hide.
- Press ⌘S and choose where to save. The file name starts with the date, for example
2026-10-16_parcel.jpg.
How to blur part of an image and keep the rest sharp
Blur only touches the area inside the box you drag, so you can hide a single line on a label and leave the rest of the photo as it was. Drag a tight box around the text rather than a big one across half the picture; the photo stays useful and the private part is still hidden.
Every box stays movable and editable until you save. If a box misses a corner of the label, move it with the Select tool, or press ⌘Z to undo and drag a new one. ⇧⌘Z redoes.
Cover instead of blur
Cover draws a filled box. It is white by default; pick black, or any other color, from the color pop-up menu next to the tools.
Which to use comes down to what you are hiding:
- Blur keeps the picture looking natural. It suits faces, a house number in the background, or a screen that should look busy but not readable.
- Cover hides everything under it. It suits card numbers, phone numbers, ID numbers and anything short that someone might try to guess from its shape.
You can use both in one picture: blur the faces, cover the phone number.
Censor a screenshot before sharing
Screenshots work the same way as photos. Open the PNG from your Desktop, blur the address and phone number, and save.
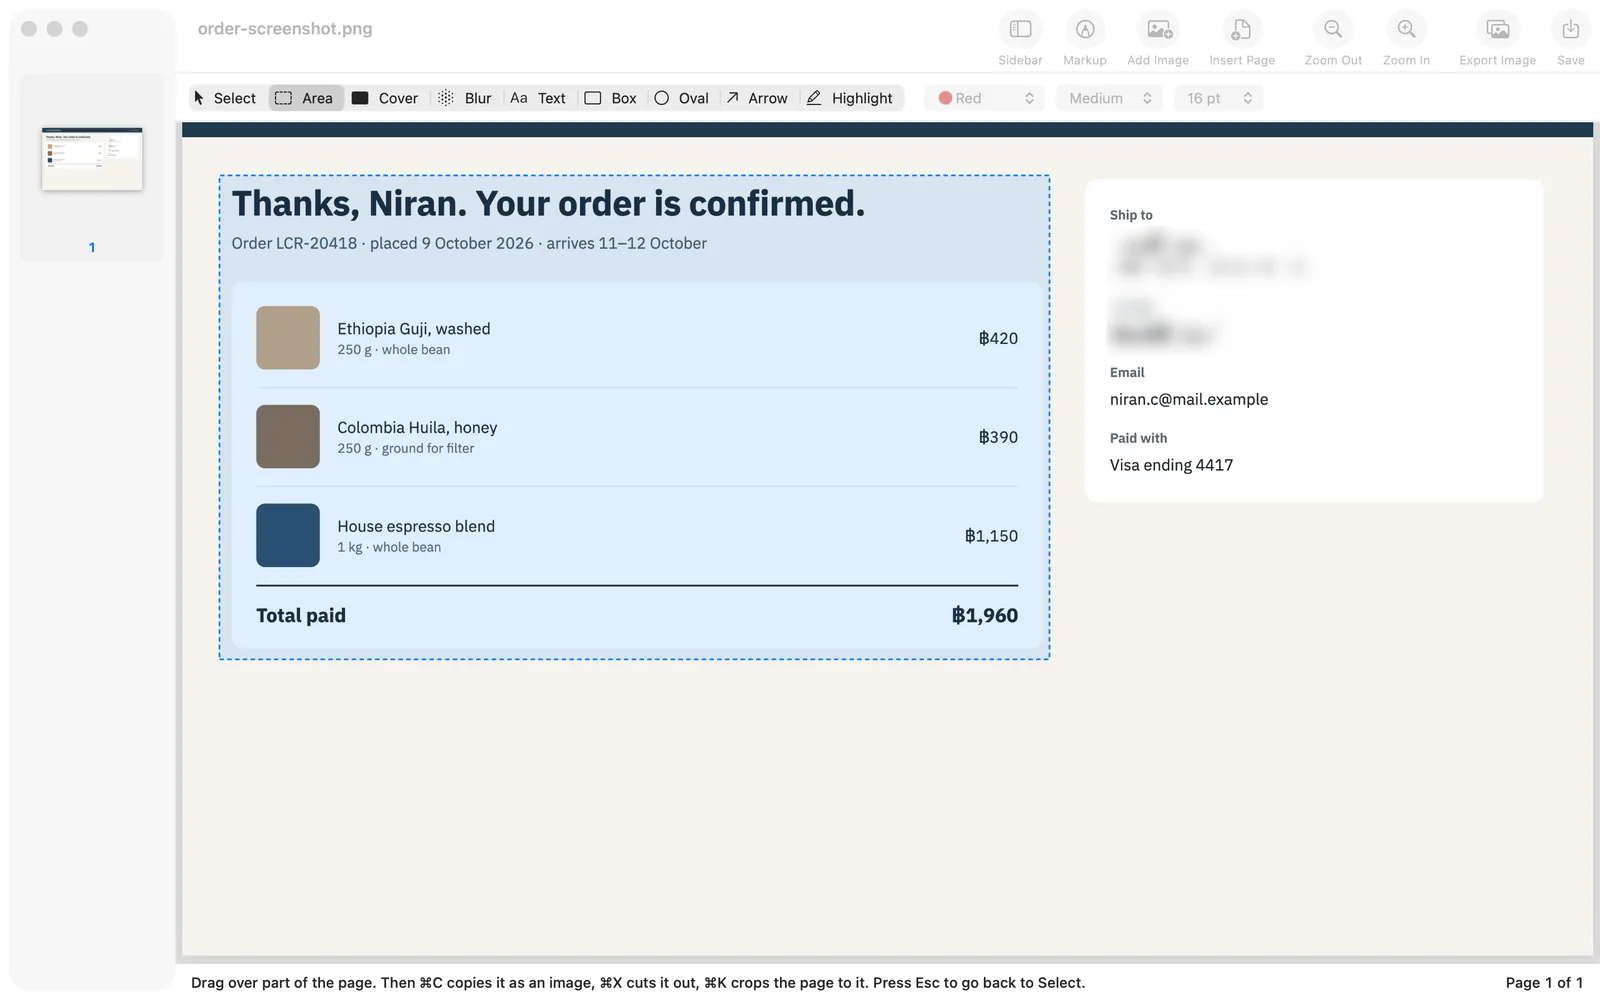
If you only need to share part of the screenshot, choose Area, drag over that part and press ⌘C. Sealpad copies just that part as an image at the screenshot’s original resolution, ready to paste into a message with ⌘V. ⌘K instead crops the whole picture to that area. The guide on cropping a screenshot on Mac has more on taking and trimming screenshots.
Saving: original size, original file untouched
Sealpad saves a picture back as a picture at its original pixel size: a JPG for photos, a PNG when the picture has transparency. You can also save it as a PDF if that is what you need to send.
The picture you opened is never overwritten. Save (⌘S) always asks where to write the new file, and the name starts with the date. That means the unblurred original is still on your Mac, so double-check that you attach the new file, not the old one.
If you need a copy of the result in another format, File > Export as Image… (⇧⌘E) writes a PNG or JPEG at the picture’s original size.
Why do this on your Mac and not online
The pictures you blur are the ones with private details in them. Sealpad works entirely on your Mac: there is no account, nothing is uploaded and it works offline. The photo never leaves your computer until you send it yourself.
For PDFs, the same Blur and Cover tools remove the hidden text from the saved file. See how to redact a PDF.