
To remove the background from a signature, place your scanned or photographed signature on the PDF in Sealpad, right-click it and choose Remove White Background. The white or off-white paper around the ink turns transparent, so the signature line and the printed name under it show through, the way real ink looks on paper.
Why a signature photo hides the document
A photo or scan of your signature is a rectangle, and the rectangle includes the paper. Drop it onto a contract and that paper sits on top of the page, covering the signature line, your printed name and your title.
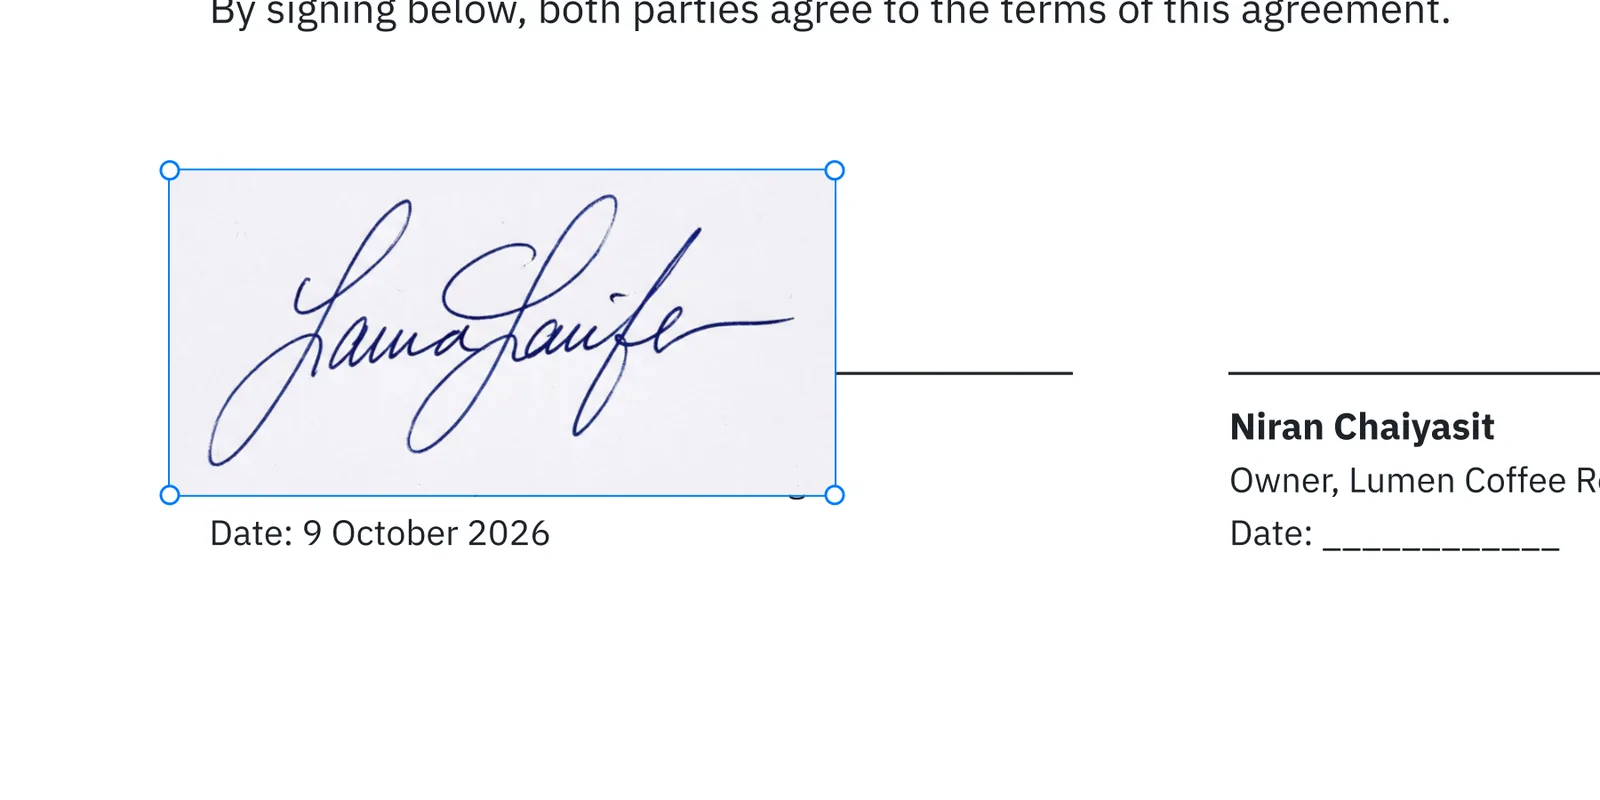
Making the signature transparent fixes that. You keep the ink and lose the paper.
How to capture a clean signature
The cleaner the picture, the cleaner the result. Remove White Background works with dark ink on white paper photographed in even light, so a minute spent on the photo saves fiddling later.
- Use a dark pen, black or dark blue, on plain white printer paper.
- Avoid lined notepaper or colored paper. Lines and color are not white, so they stay behind.
- Sign a little larger than you normally would. Making a picture smaller keeps it sharp; making it bigger does not.
- Scan it, or photograph it straight-on in even light, such as daylight from a window. Keep the shadow of your hand and phone off the paper.
- Leave some space around the signature. You can crop it later.
A photo taken with your phone is fine once it is on your Mac.
How to remove the background from a signature in Sealpad
- Download Sealpad from the download page. It is free and runs on macOS 15 Sequoia or later.
- Open your PDF with File > Open (⌘O), or drag it onto the Sealpad icon in the Dock. It opens as a copy, so the original is never overwritten.
- Add the signature image. Drag it from Finder onto the page, or select it in Finder, press ⌘C and then ⌘V in Sealpad. File > Add Image to Page… (⇧⌘I) works too.
- Right-click the signature and choose Remove White Background.
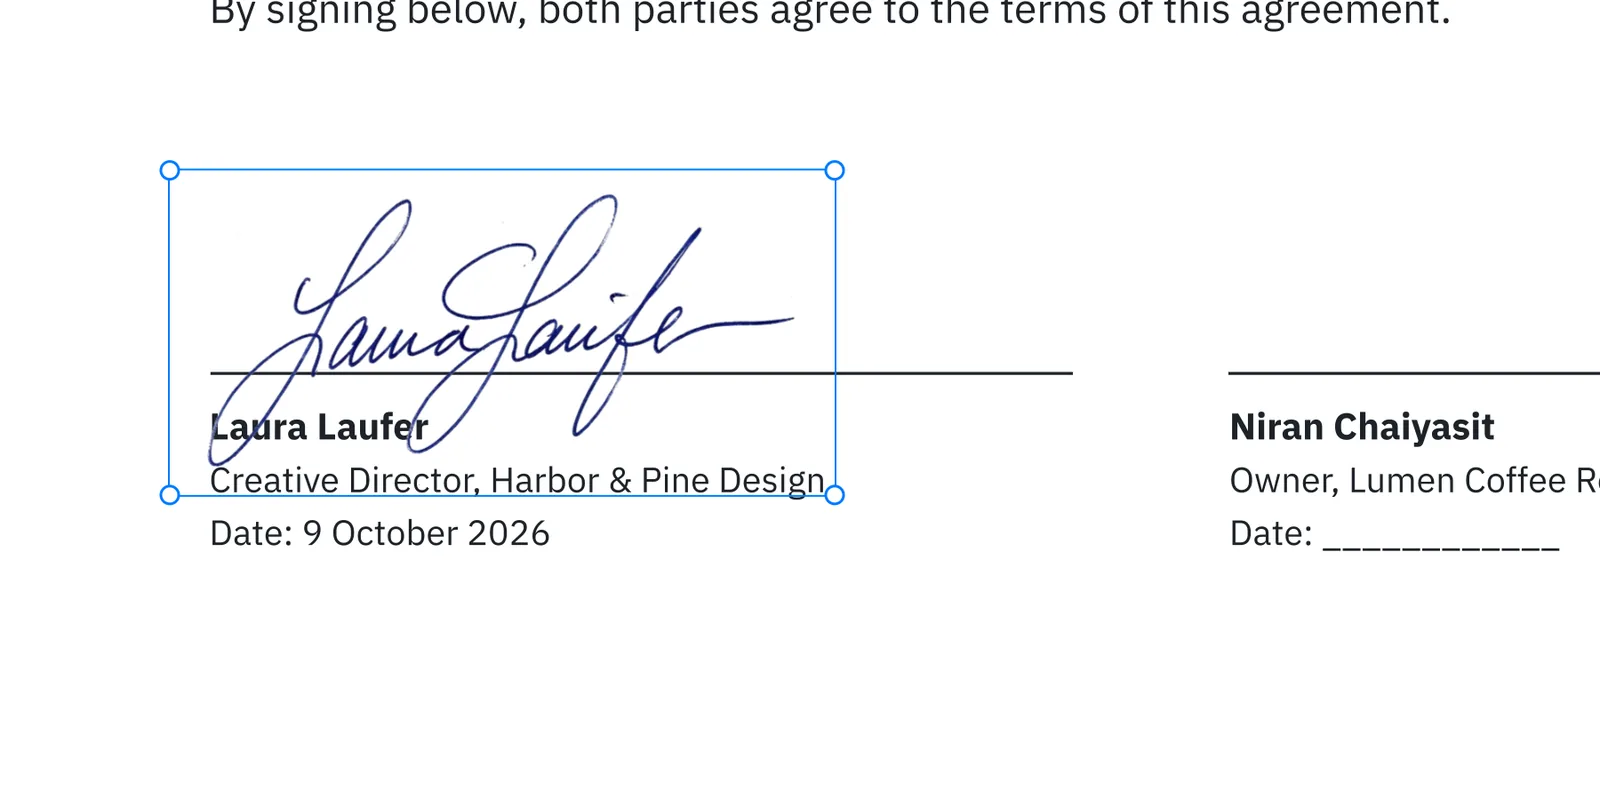
- Drag the signature onto the line.
- Drag a corner to make it the right size.
- Press ⌘S and choose where to save. The new file’s name starts with the date, for example
2026-10-16_agreement.pdf.
Crop the extra paper
Even after the paper turns transparent, it is still part of the image, so the selection handles can sit far away from the ink. Cropping the signature tight makes it easier to place, and it cuts off anything else that ended up in the photo, such as the edge of the desk or a second attempt at signing.
- Double-click the signature. You can also select it and choose Edit > Crop (⌘K), or right-click it and choose Crop Image.
- Drag the handles on the edges and corners in toward the ink. The part being cut away shows faded, so you can see what will go.
- Press Return.
If you cut too much, right-click the signature and choose Reset Crop to bring the whole image back.
If the background does not fully disappear
Remove White Background takes away white and off-white paper. Anything that is not close to white stays. Leftovers usually come from one of these:
- A grey patch or a dark corner. That is a shadow, usually from your hand or phone. Take the photo again in even light.
- Faint lines or a tint. The paper was lined or colored. Sign again on plain white paper.
- A thin, broken signature. The pen was too light. Use a darker pen and press a little harder.
It does not cut a signature out of a busy background, such as a signature written across a printed form. Sign on a blank sheet instead.
Reuse your signature
Keep the original signature photo in a folder you can find quickly. Each time you sign a new document, add the same file and choose Remove White Background again; it is one right-click.
For a document that needs your signature or initials on every page, place it once, right-click it and choose Repeat on Every Page. A copy goes in the same spot on every page, and each one can still be moved before you save.
The same steps work for a company stamp pressed on white paper. For the full signing workflow, including adding the date and what an image signature is and is not, see how to sign a PDF on Mac.