
To add an image to a PDF on a Mac, open the PDF in Sealpad and drag the picture from Finder onto the page, or copy it and press ⌘V. Then drag it into place, resize it from a corner and crop it if you need to. To add the picture as a page of its own instead, use File > Insert Image as New Page… (⌥⌘I).
Open the PDF
Sealpad is a free Mac app for macOS 15 Sequoia or later. Get it from the download page, which also explains the one extra click macOS asks for the first time you open it.
Choose File > Open (⌘O) and pick the PDF, or drag the PDF onto the Sealpad icon in the Dock. It opens as a copy, so nothing you do touches the original file.
Three ways to add an image to a PDF on Mac
Use whichever fits where the picture is right now.
Drag it from Finder
Drag the image file from a Finder window and drop it on the page. Use this when the file is already on your Desktop or in Downloads.
Copy and paste it
Copy an image in another app and press ⌘V in Sealpad. This also works with an image file: select it in Finder, press ⌘C, switch to Sealpad and press ⌘V.
Use the menu
Choose File > Add Image to Page… (⇧⌘I) and pick the file. Handy when you know the file name but not which window it is in.
Move and resize the image
- Drag the image to move it.
- Drag any corner to make it larger or smaller.
- Right-click it for Copy, Cut or Delete.
Everything stays movable and editable until you save. ⌘Z undoes any step and ⇧⌘Z redoes it, so you can try a position and go back.
Crop an image inside the PDF
A photo often has more in it than you want on the page: a table edge, a wall, a second product. You can crop it after placing it, without opening another app.
- Double-click the image. You can also select it and choose Edit > Crop (⌘K), or right-click it and choose Crop Image.
- Drag the handles on the edges and corners to the part you want to keep. The part being cut away shows faded.
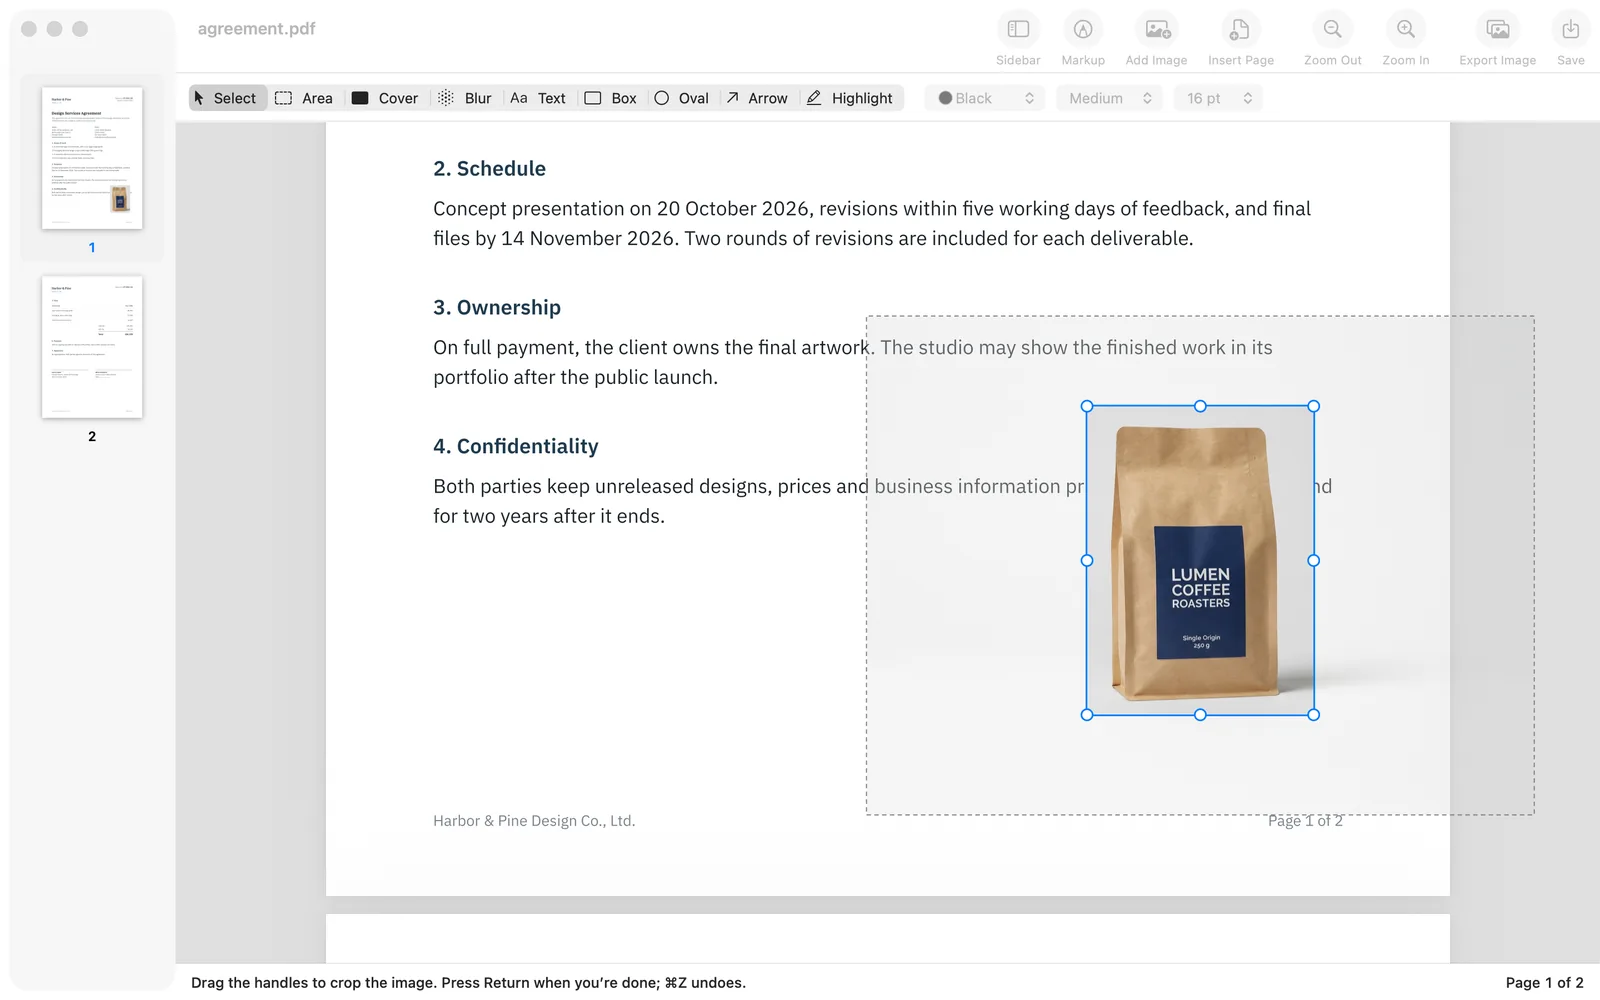
- Press Return.
The crop is not permanent until you save. Right-click the image and choose Reset Crop to bring the whole picture back.
Insert an image as a new page
Sometimes the picture should be its own page: a scanned receipt at the end of an expense report, a photo of a signed form, a floor plan at the back of a proposal.
- Choose File > Insert Image as New Page… (⌥⌘I).
- Pick the image file.
This also lets you turn photos into a PDF. Open the first photo in Sealpad, then insert the next one as a new page. A picture with a second page can only be saved as a PDF, so Save gives you a PDF with one photo per page.
Repeat a logo on every page
For a logo in the header, a “Draft” mark or a company stamp that belongs on every page:
- Place the image on one page and get the position and size right.
- Right-click it and choose Repeat on Every Page.
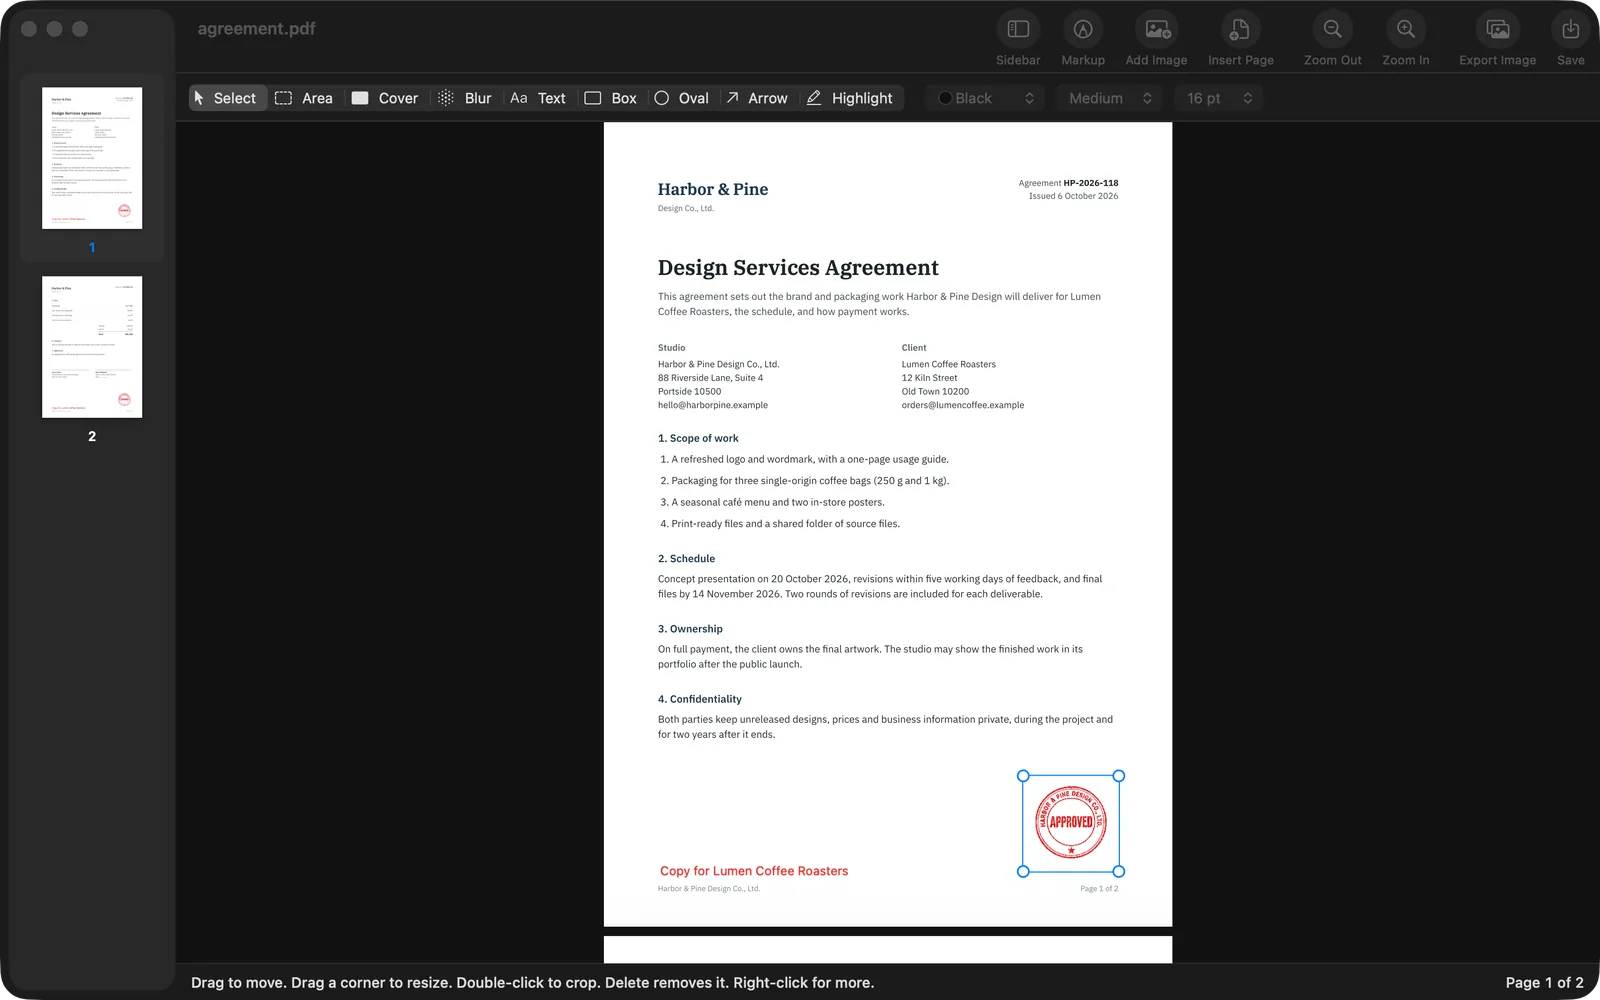
Each page gets a copy in the same spot. You can still move any single copy before saving.
Signatures, stamps and logos on white paper
A scanned signature, stamp or logo usually comes with white paper around it, and that paper covers the text underneath. Right-click the image and choose Remove White Background to make the white or off-white paper transparent. It works with dark ink on white paper in even light.
The guide on removing the background from a signature has tips for getting a clean scan, and adding a company stamp to a PDF covers quotes, invoices and contracts.
Save the PDF
Press ⌘S. Sealpad always asks where to save, and the new file’s name starts with the date, for example 2026-10-16_proposal.pdf. The PDF you opened is never overwritten.
Sealpad works entirely on your Mac: no account, no upload and no internet connection needed. The pictures you add stay on your computer.